BILLSAVE WORKFLOW

How to calculate and compare an electricity bill

BillSave is an independent electricity bill calculation and offer comparison platform. Upload your interval energy CSV data, or optionally connect an IAMMETER Cloud Site, then apply supported tariffs to the same usage period and identify offers that fit your actual consumption.

QUICK OVERVIEW

The calculation workflow

Use this summary when you already know the application. The detailed manual below explains every screen and decision.

  1. Select a country and find an offer

    Choose Australia or Great Britain, search for a retailer or Supplier and select a published tariff. You can keep up to five offers in the sidebar.

  2. Review the tariff and required parameters

    Check effective dates, calculation quality, official sources and any customer-specific information requested by the offer.

  3. Create or connect your BillSave account

    Create a BillSave account with your email to upload CSV data, or continue with IAMMETER to load an authorised Cloud Site without uploading a file.

  4. Choose the energy source and billing period

    Upload a saved Dataset created from interval CSV, or use an IAMMETER Cloud Site after IAMMETER sign-in. Australia also accepts NEM12 v2.7.

  5. Confirm channels, streams and coverage

    Map Grid and Controlled Load correctly, then review interval resolution, absolute timestamps, gaps and quality.

  6. Calculate the bill

    BillSave freezes or reuses the energy revision and applies the supported tariff rules without silently treating missing values as zero.

  7. Review and compare the result

    Review totals, components, assumptions, quality and evidence, then compare selected offers or use Find Best with the same energy revision.

NEED HELP?

Tell us what happened

If you encounter a problem while choosing an offer, mapping a meter or calculating a bill, post the details on the IAMMETER community forum. Do not include private account or complete connection identifiers.

BEFORE YOU START

Prepare a representative billing period

BillSave estimates are intended for comparison. They are not retailer invoices, settlement statements, financial advice or a retailer-switching service.

For the most useful result, prepare the following information.

DETAILED USER GUIDE

How to use BillSave

BillSave applies published electricity-offer rules to the timing of your grid import and solar export. Upload interval data without IAMMETER, or connect an IAMMETER Cloud Site as an optional data source; every comparison keeps one source and period fixed.

STEP 1

Open BillSave and select a country

Visit billsave.iammeter.com. Under Country or region, choose an enabled market such as Australia or Great Britain, then select Find and compare plans.

Country selection keeps market terminology, location rules, offers and saved workspace state separate. A country marked Coming soon cannot yet be used.

Select a country in IAMMETER BillSave
Choose an enabled country before entering the plan-search application.

STEP 2

Create or connect your BillSave account

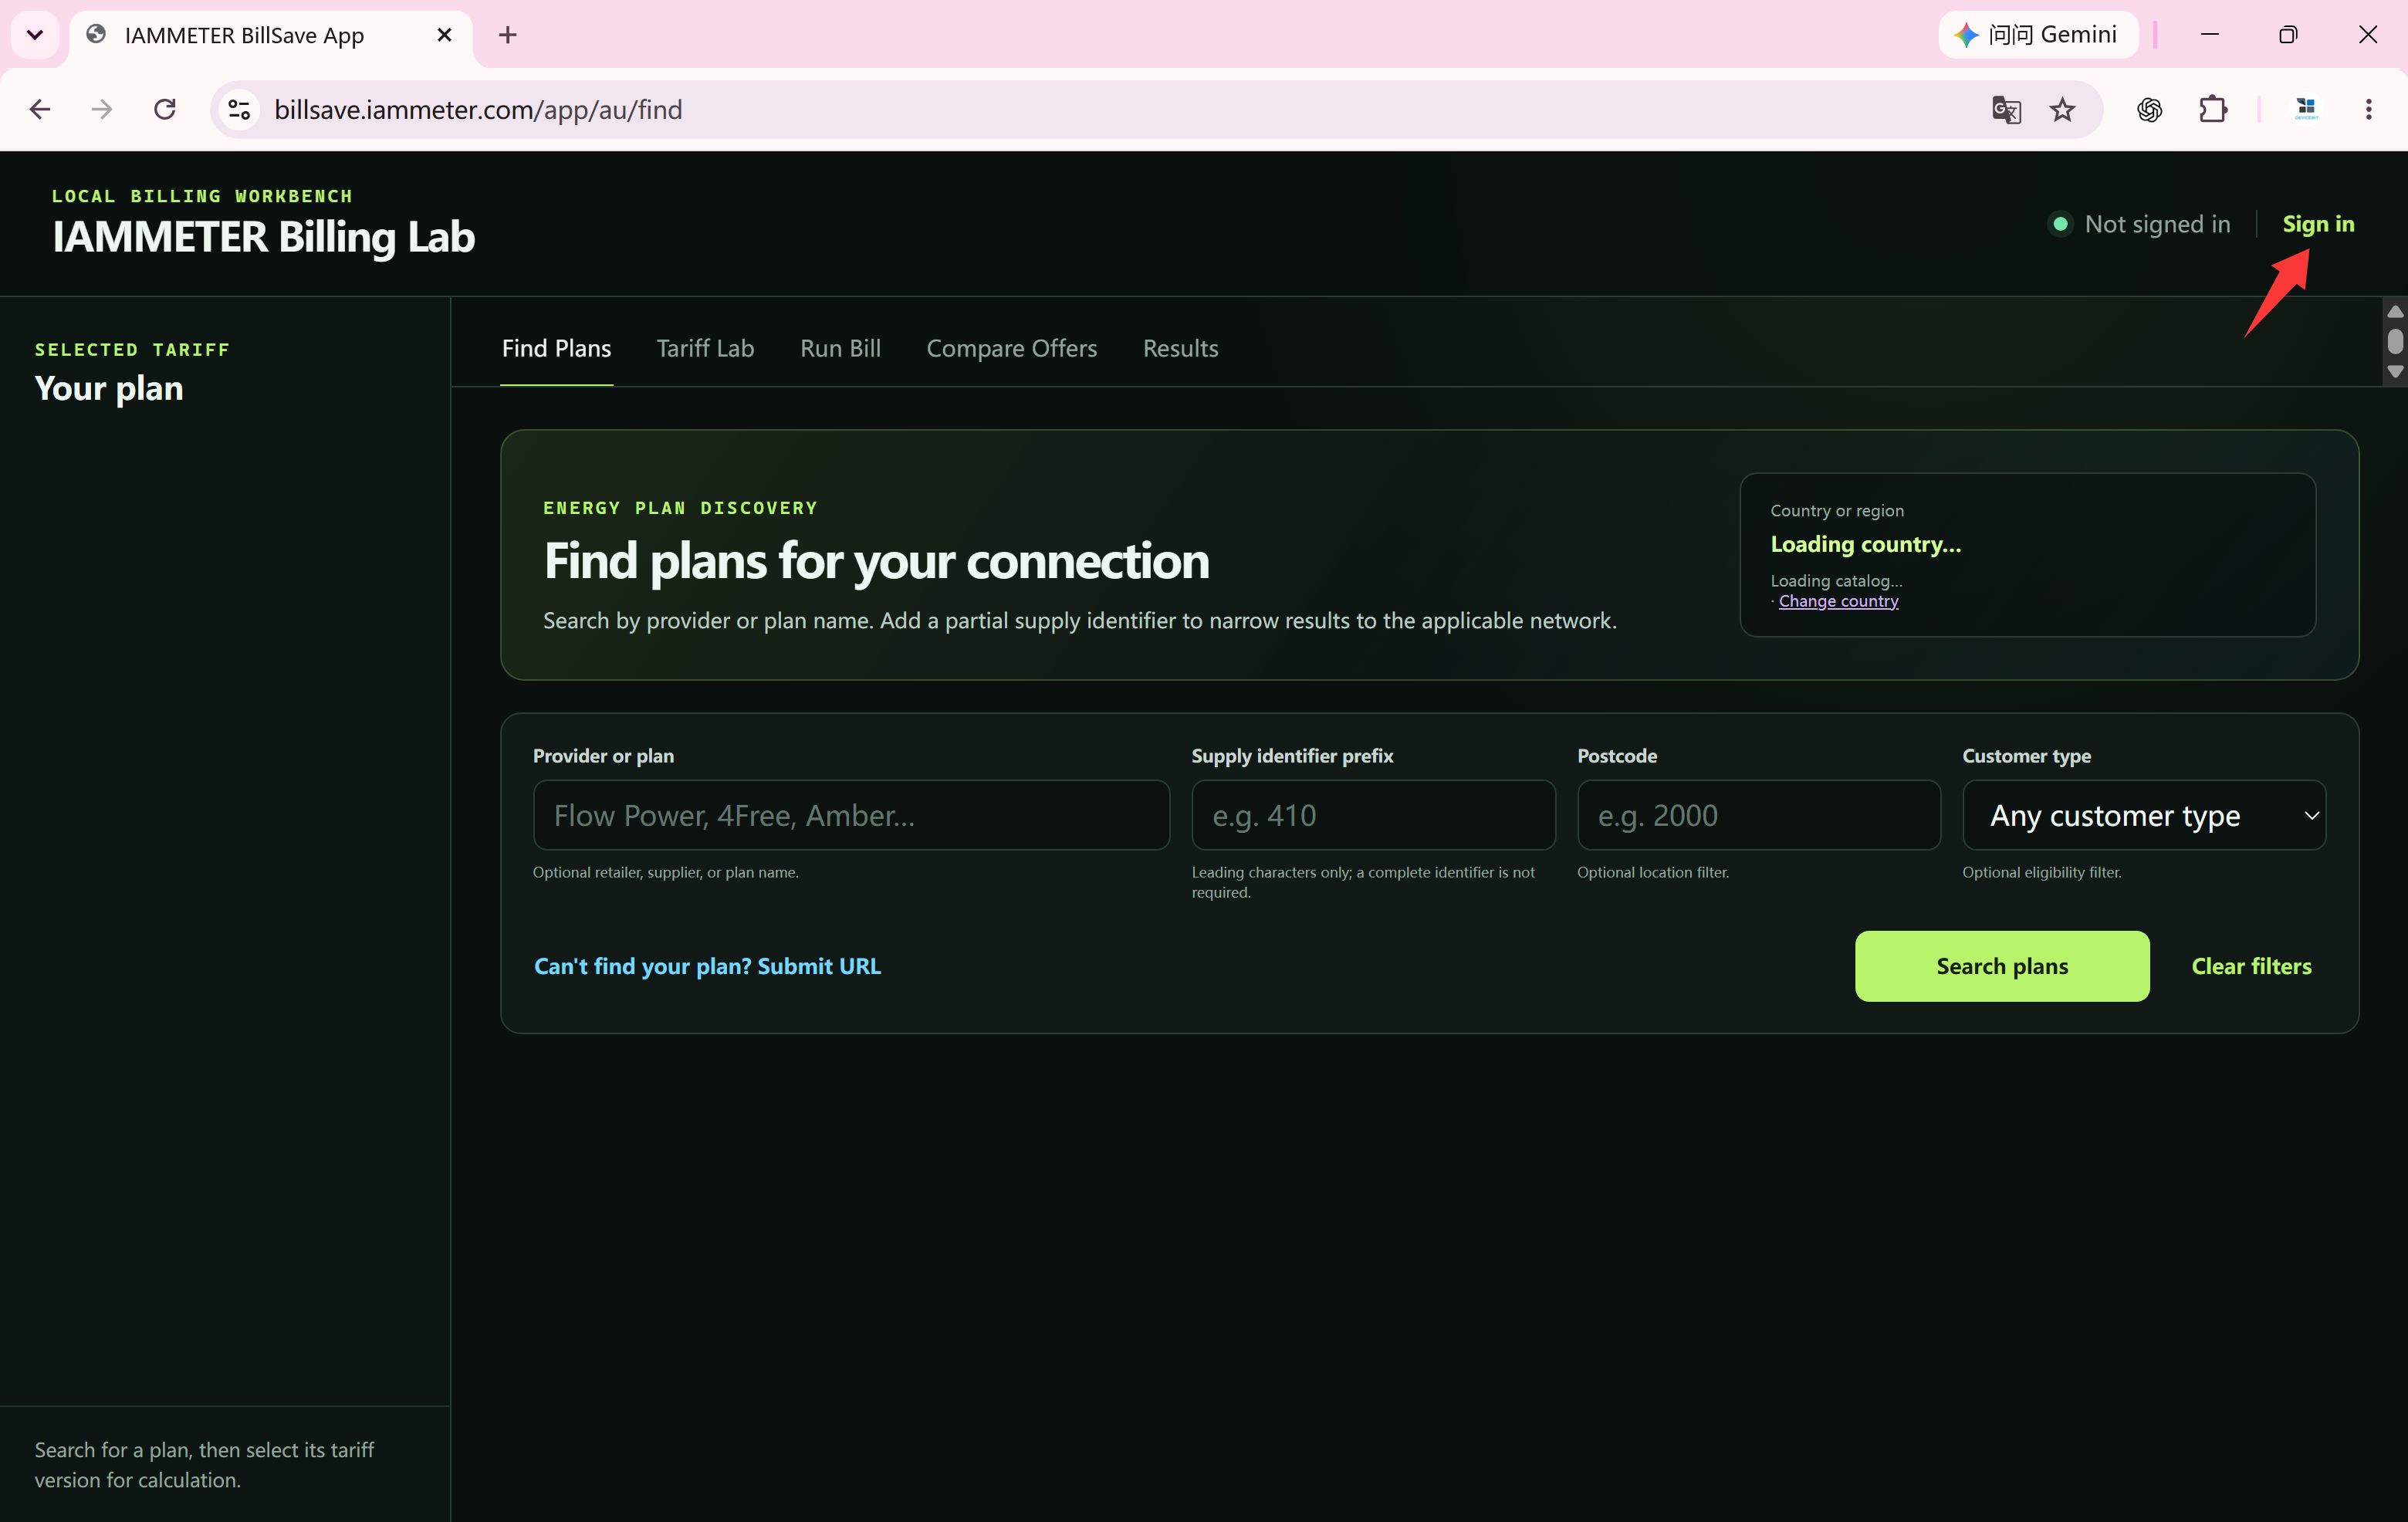
Open Sign in / Register. Create a BillSave account with your email to upload interval CSV data, or choose Continue with IAMMETER to authorise access to an IAMMETER Cloud Site.

Either route provides a private BillSave workspace for Datasets, parameters, Runs and reports across browsers. IAMMETER sign-in is optional and removes the need to upload CSV when the required Site data is already in IAMMETER Cloud.

STEP 3

Find an electricity offer

Open Find Plans. Search by provider or plan name and add the connection information available in that market. Australia can use a partial NMI, postcode, region and DNSP; Great Britain uses its own regional and network context.

Select Search plans to view matching published Offer versions. Search matches do not guarantee customer eligibility; confirm eligibility with the retailer or Supplier.

  • Do not publish a complete NMI, MPAN, account number or unredacted bill in a public forum.
Search electricity retailers, Suppliers and offers
Search with the market-specific connection details available to you.

STEP 4

Select and configure an offer

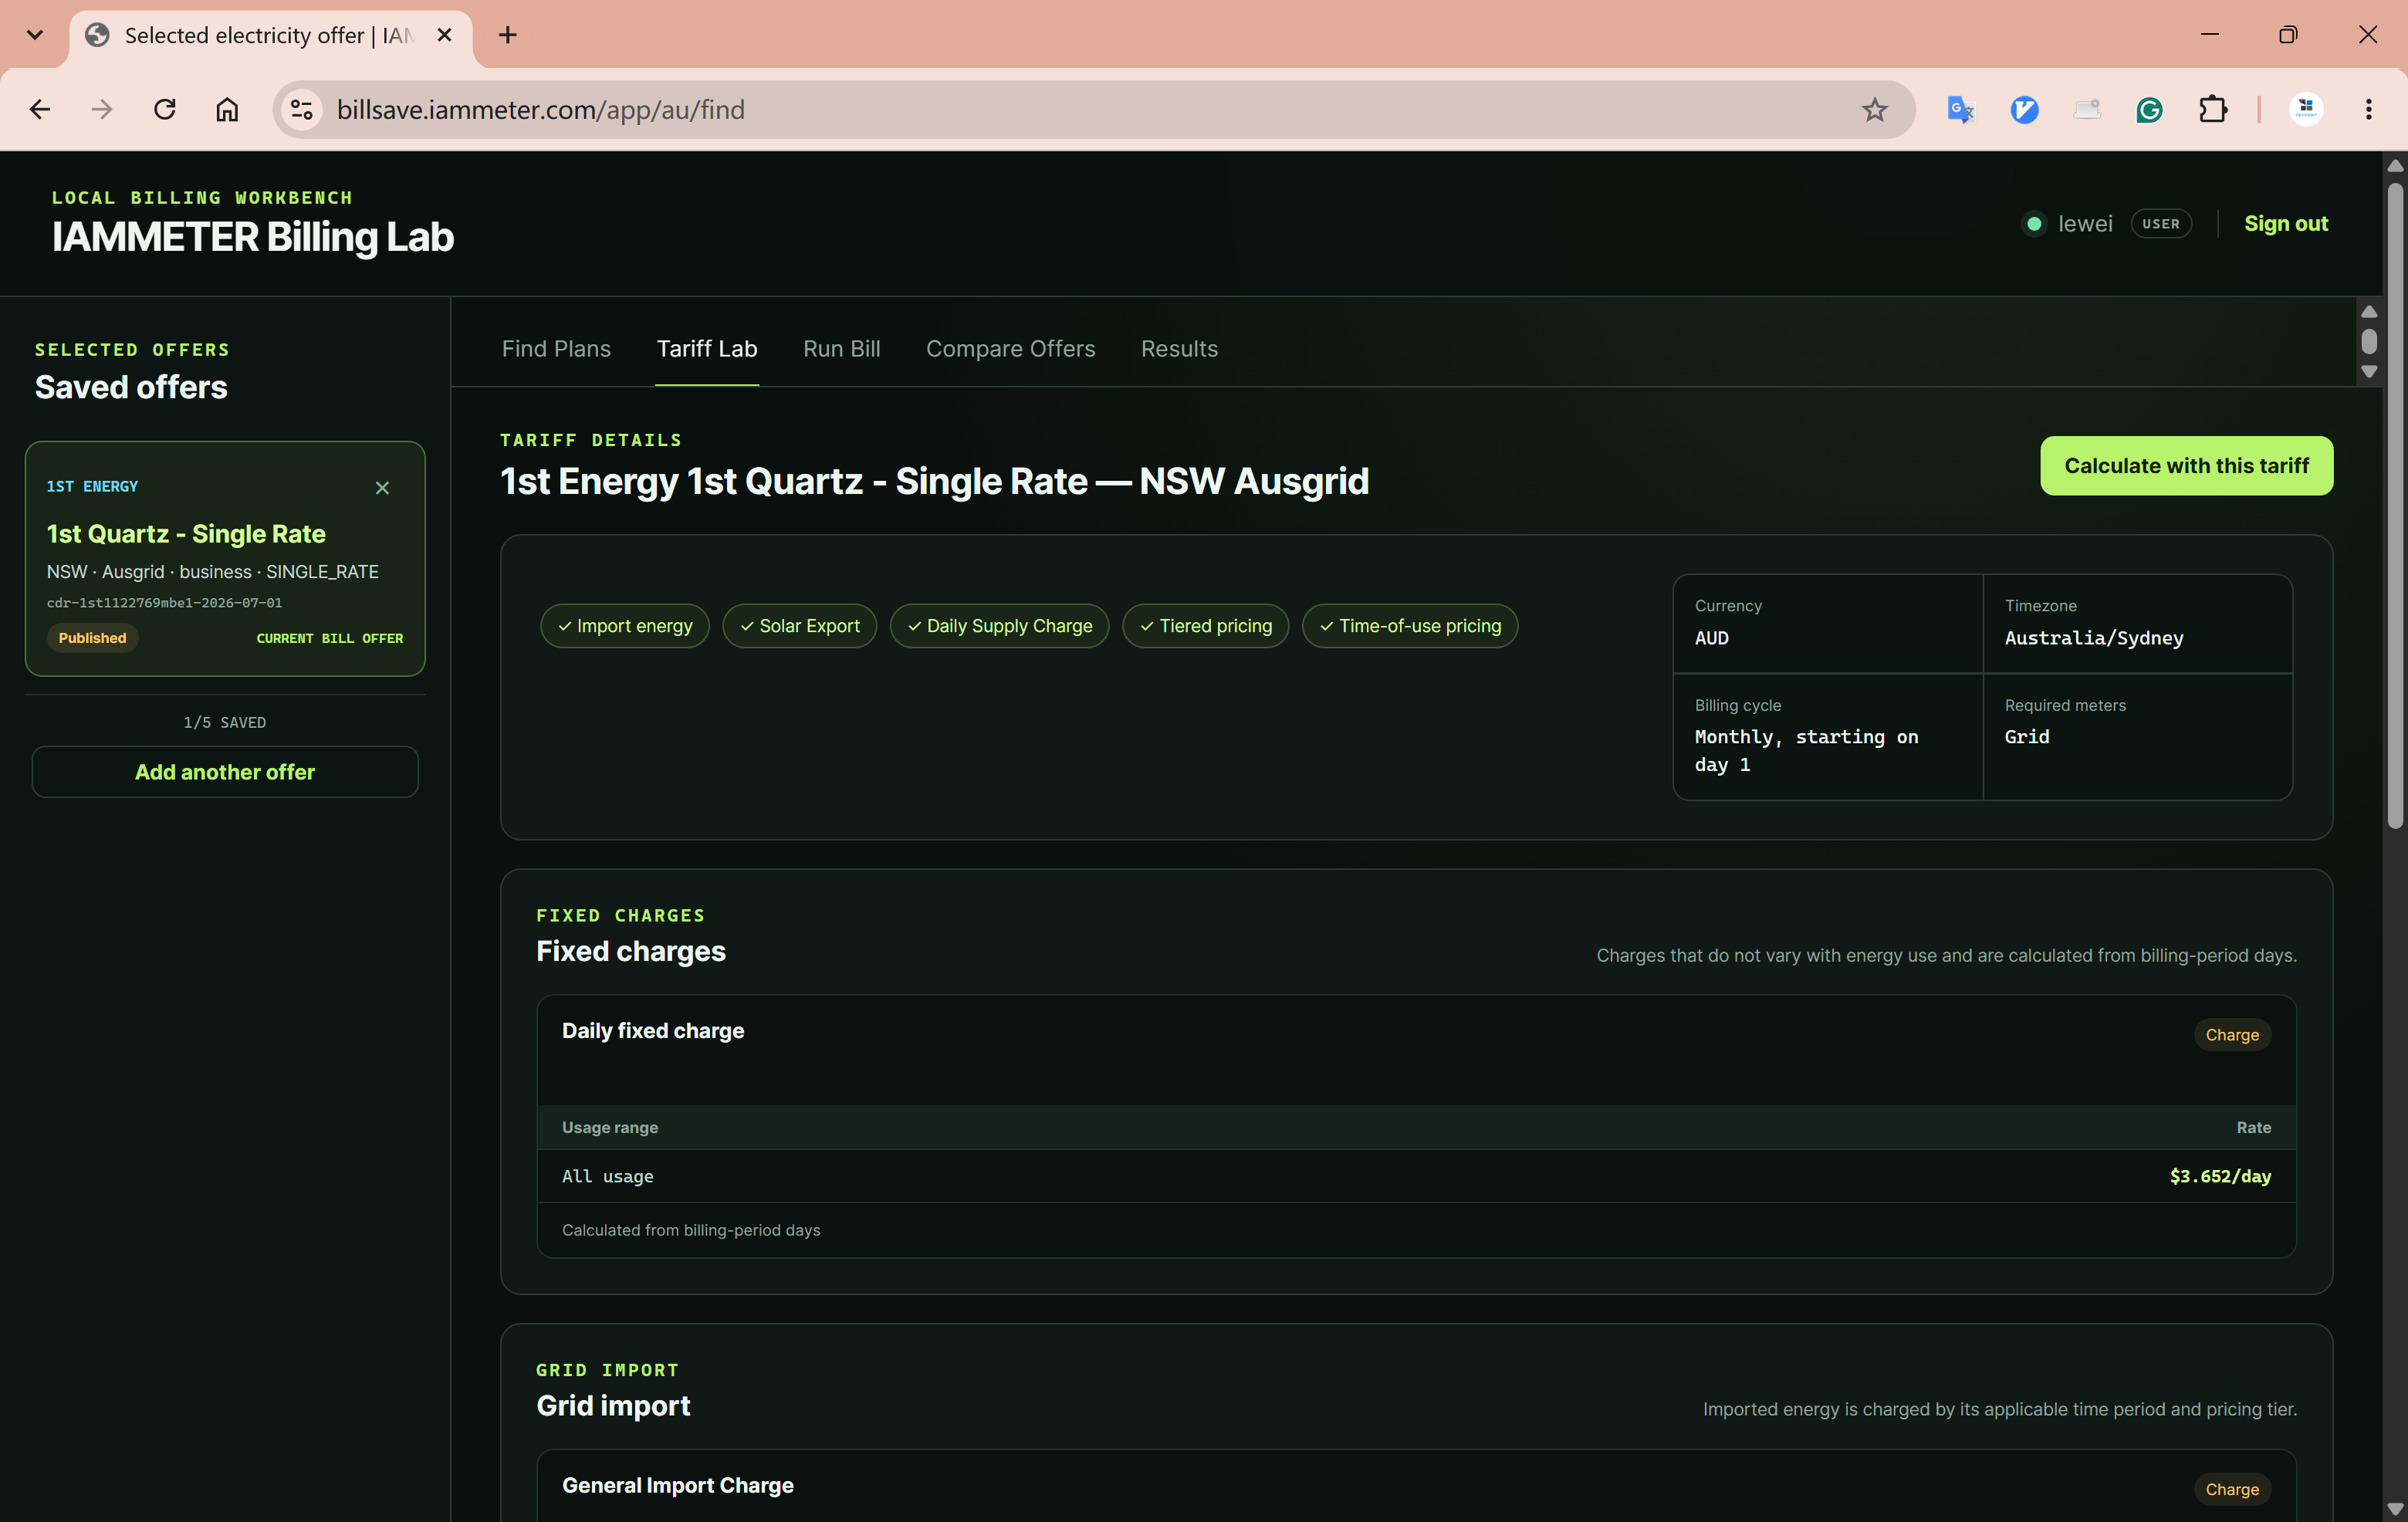
Review the retailer or Supplier, Plan and Offer identity, location coverage, customer type, effective date, rates, calculation quality and official sources. Choose Calculate with this tariff when it is the offer you want to run.

Some offers depend on facts such as a Network Tariff Code, BPEA value or tax treatment. Confirm a suggested value only when it matches your account, or enter the actual value.

The Offer setup remains a browser draft until a Cloud Site or uploaded Dataset is selected. BillSave then revalidates and saves confirmed values to that connection scope. A missing required value is not silently treated as zero.

Review a BillSave offer before calculation
Review rates, eligibility, quality and sources before selecting the tariff.

STEP 5

Choose your energy data source

This is the second section in Run Bill, after Offer selection and setup.

BillSave interval CSV: upload real 5, 15 or 30-minute intervals with offset-aware timestamps. This works with an email-created BillSave account in every enabled market.

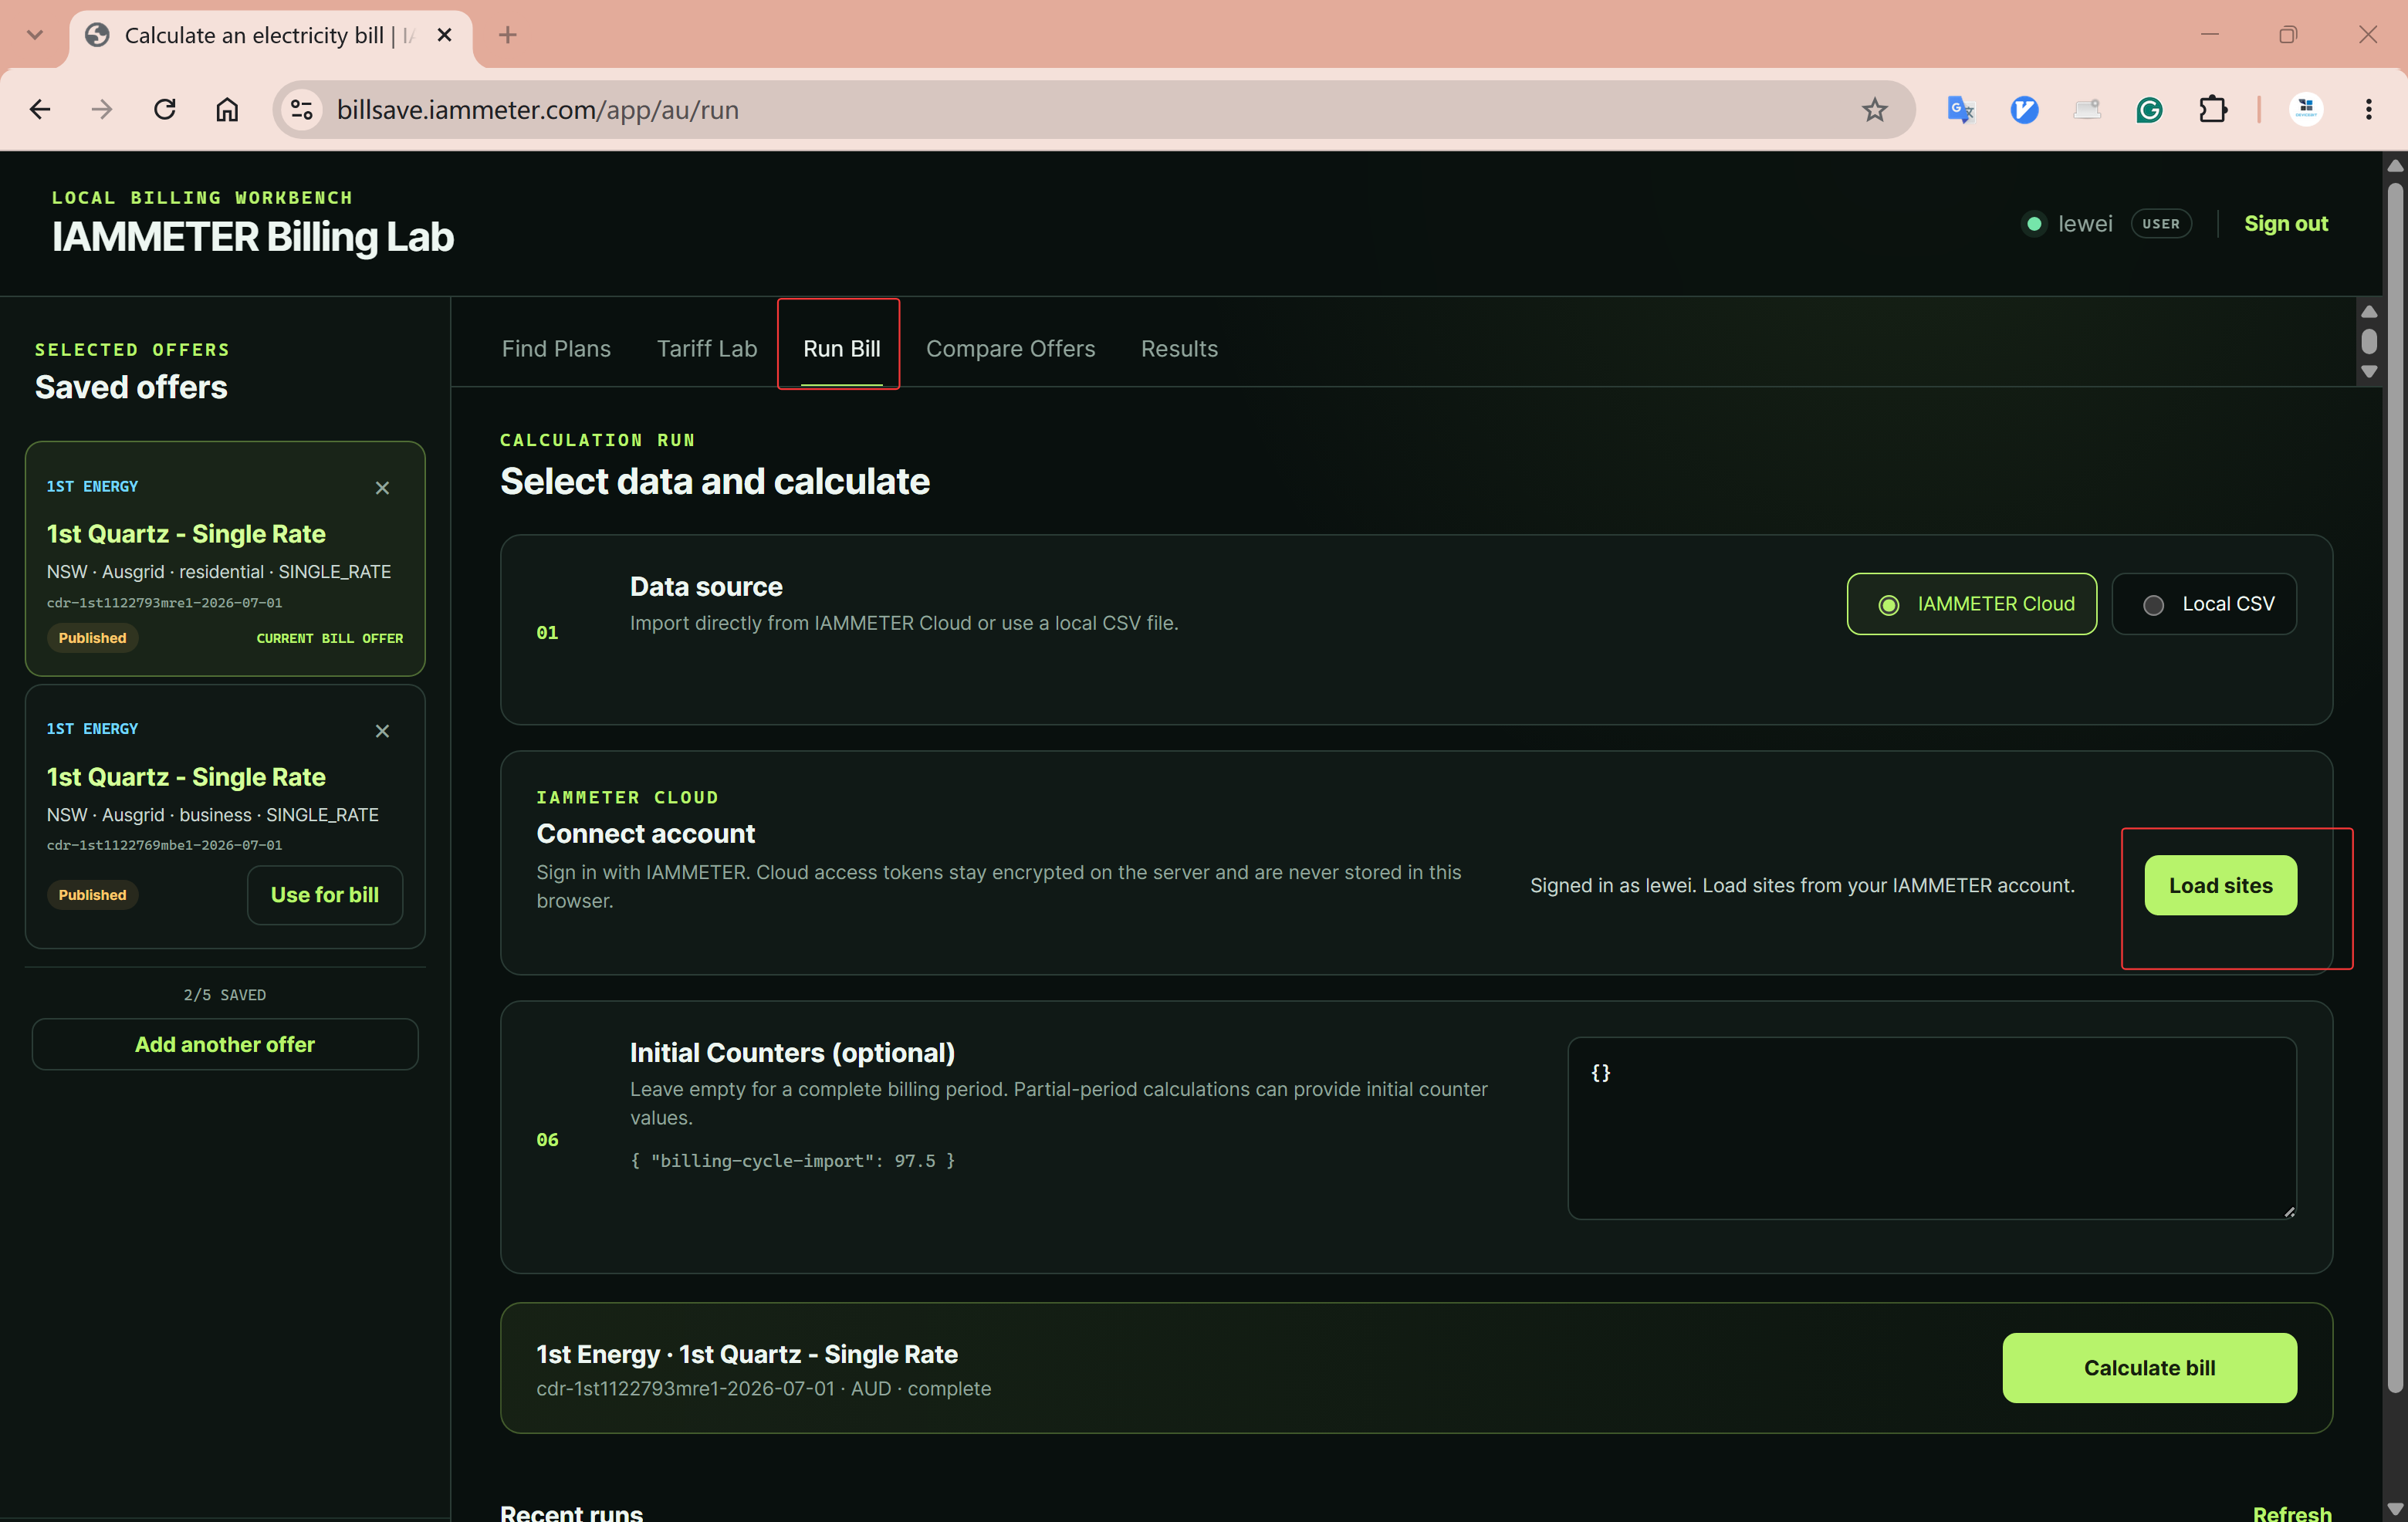
IAMMETER Cloud: after Continue with IAMMETER, select Load sites, choose an authorised Site and select a billing cycle.

Australian NEM12: upload an uncompressed UTF-8 AEMO MDFF NEM12 v2.7 file. Preview discovers kWh streams and requires an explicit role for each stream before saving.

Choose an energy source in Run Bill
Upload a private Dataset, or use IAMMETER sign-in to select an authorised Cloud Site.

STEP 6

Confirm channels, streams and data coverage

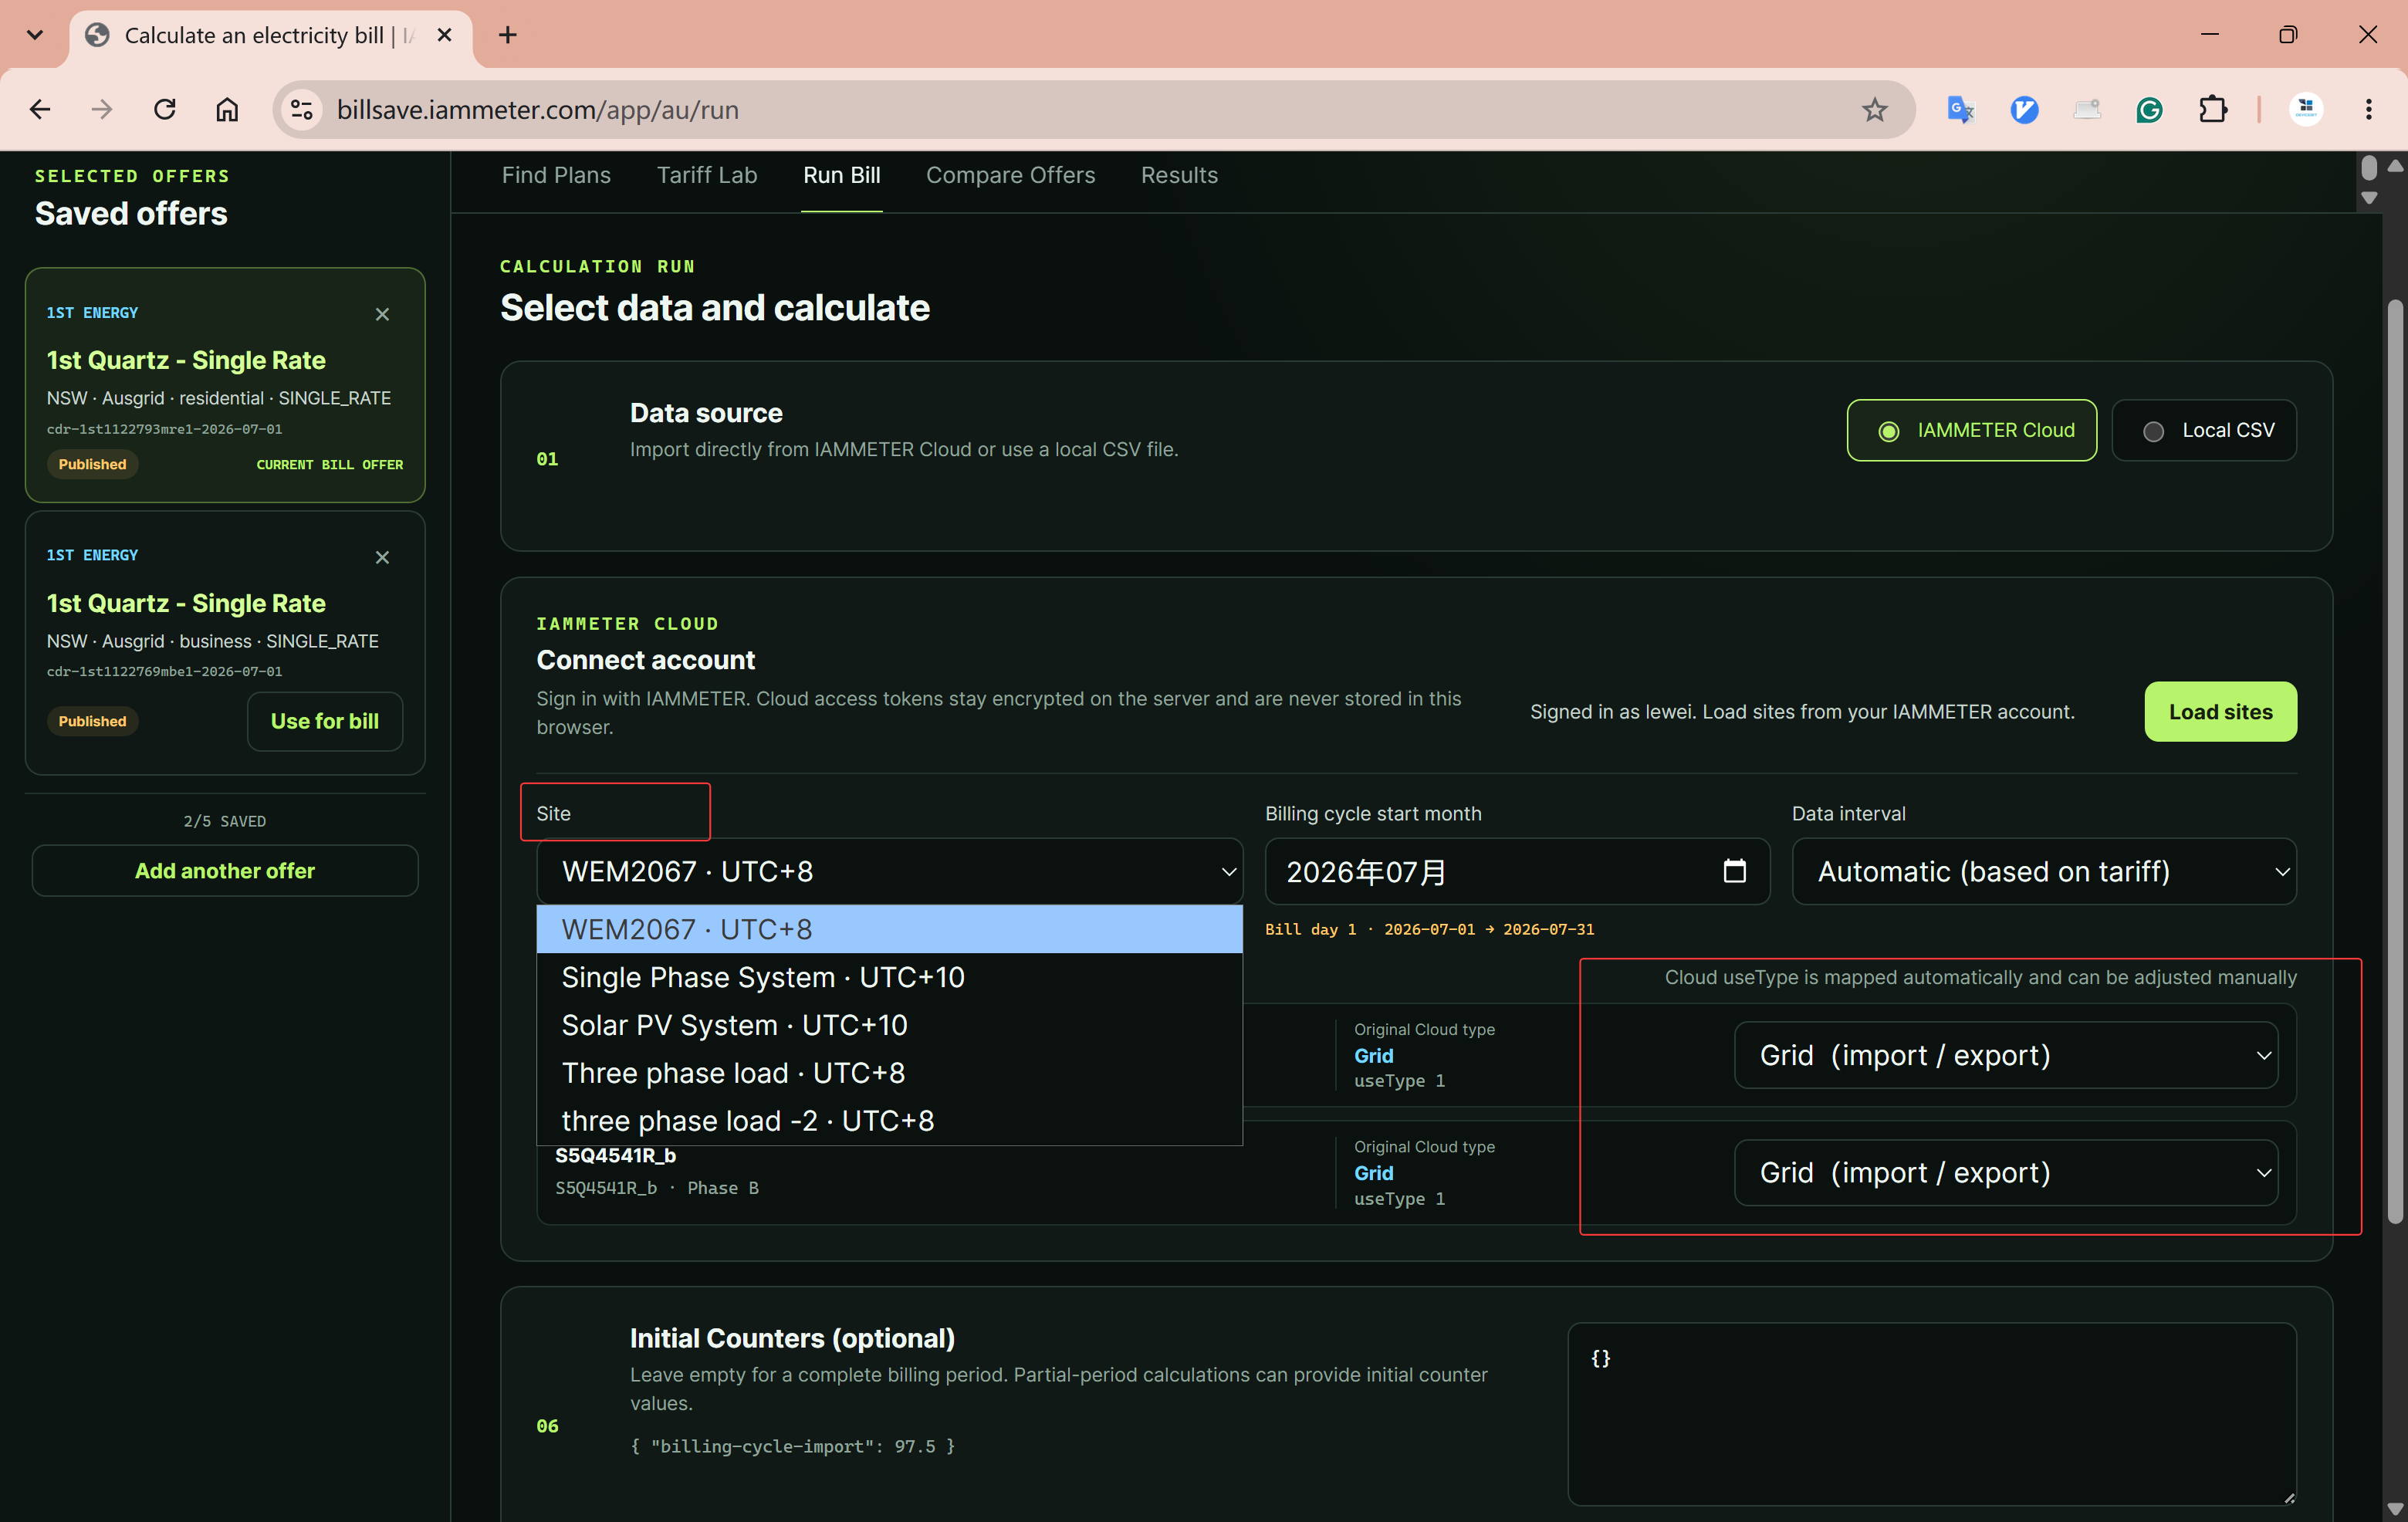
Assign every normal main-supply channel or stream to Grid. Assign Controlled Load only to an independently metered circuit billed under a separate controlled-load tariff. Multiphase Grid channels are aligned and combined before billing.

For CSV, confirm absolute timestamp offsets, interval length, period, roles, gaps and quality. For NEM12, map every kWh stream to Grid import, Grid export, Controlled Load import or Ignore.

Five-minute input remains available to interval-sensitive offers and can also be summed for ordinary 30-minute tariffs. BillSave never invents five-minute data from a 30-minute source.

Confirm Grid and Controlled Load energy roles
Confirm every Cloud channel or uploaded stream before calculation.

STEP 7

Calculate the bill

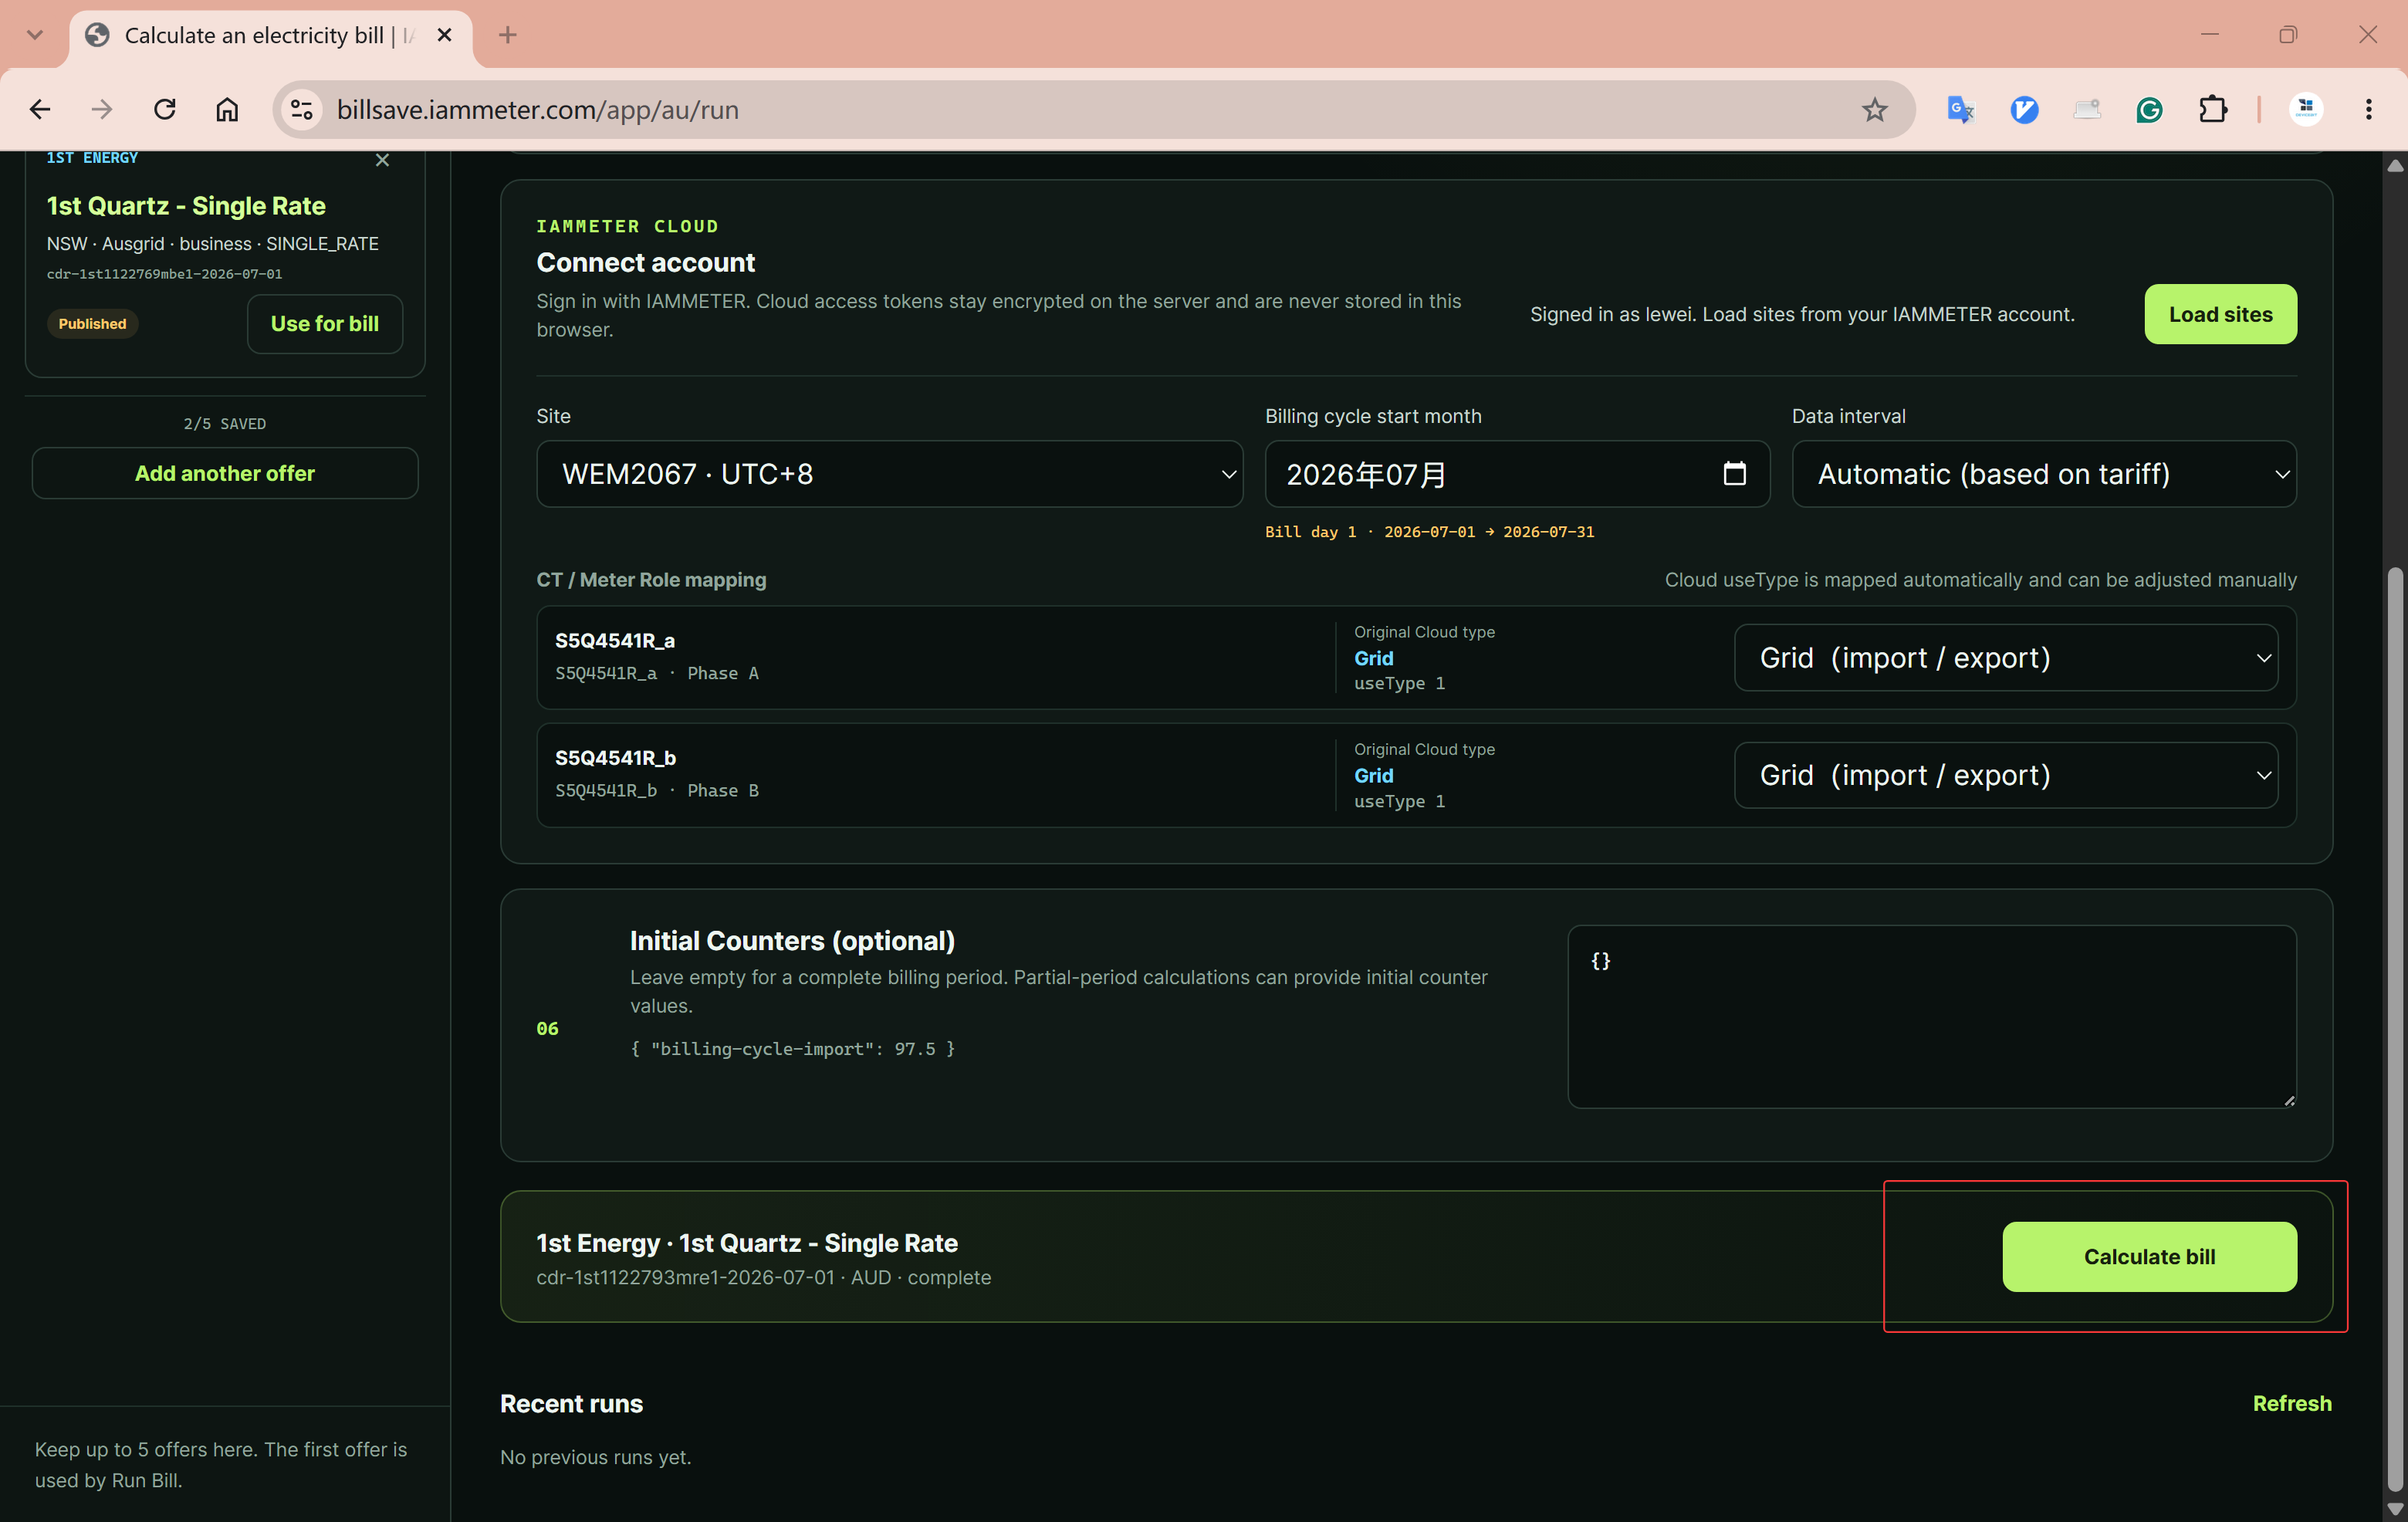
After the Offer, required inputs, energy source and billing period are ready, select Calculate bill. To change the Offer, use Change offer at the top of Run Bill.

BillSave freezes the selected energy revision and applies supported daily charges, flat or time-of-use usage, tiers, controlled-load rates, supported demand charges, solar credits, discounts, fees and variable adjustments.

Tiered pricing requires complete energy coverage for the selected billing period. If required energy or Tariff information is unavailable, BillSave stops or discloses an omitted component instead of manufacturing a complete total.

Start a BillSave electricity bill calculation
Check the Offer, energy source and period, then calculate the bill.

STEP 8

Review the estimated bill

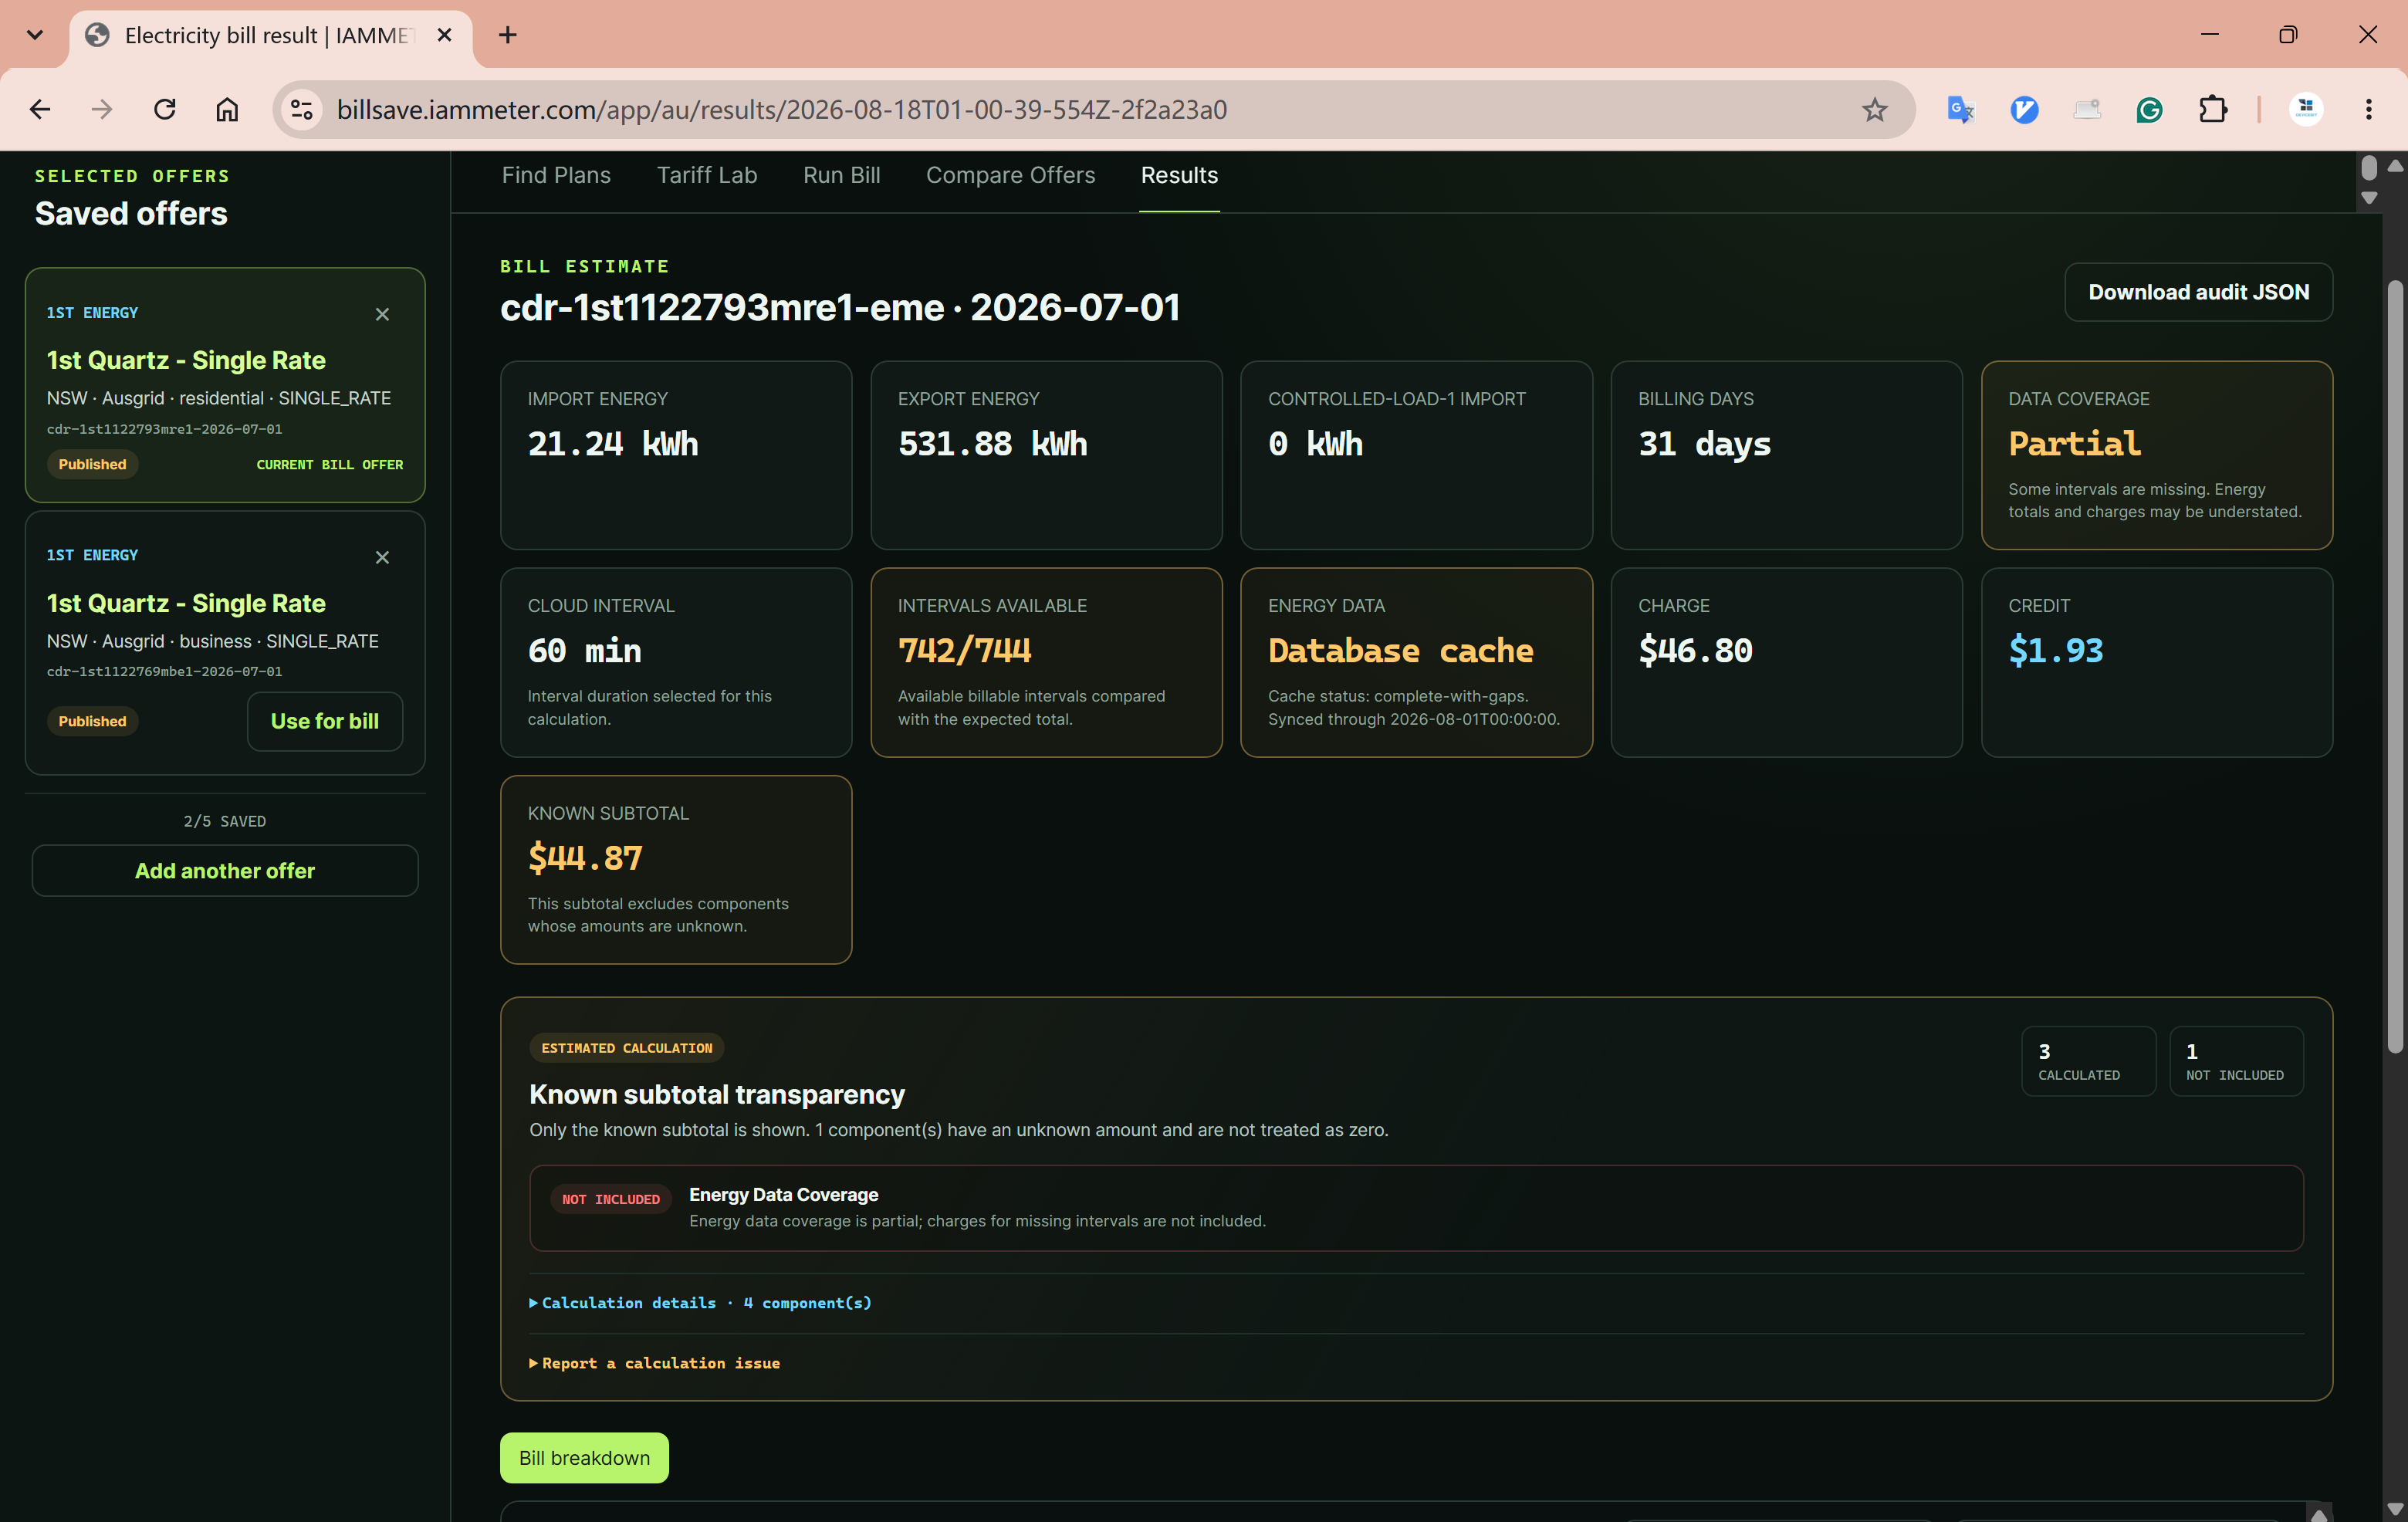
Do not review only the estimated total. Check the retailer and Tariff version, billing period, grid import and export, Controlled Load energy, components, calculation quality, assumptions, customer-confirmed values, warnings and official sources.

A result can differ from a retailer invoice because of taxes, rounding, account-specific settings, conditional benefits, incomplete data, retailer adjustments or a rule not represented by that Tariff version.

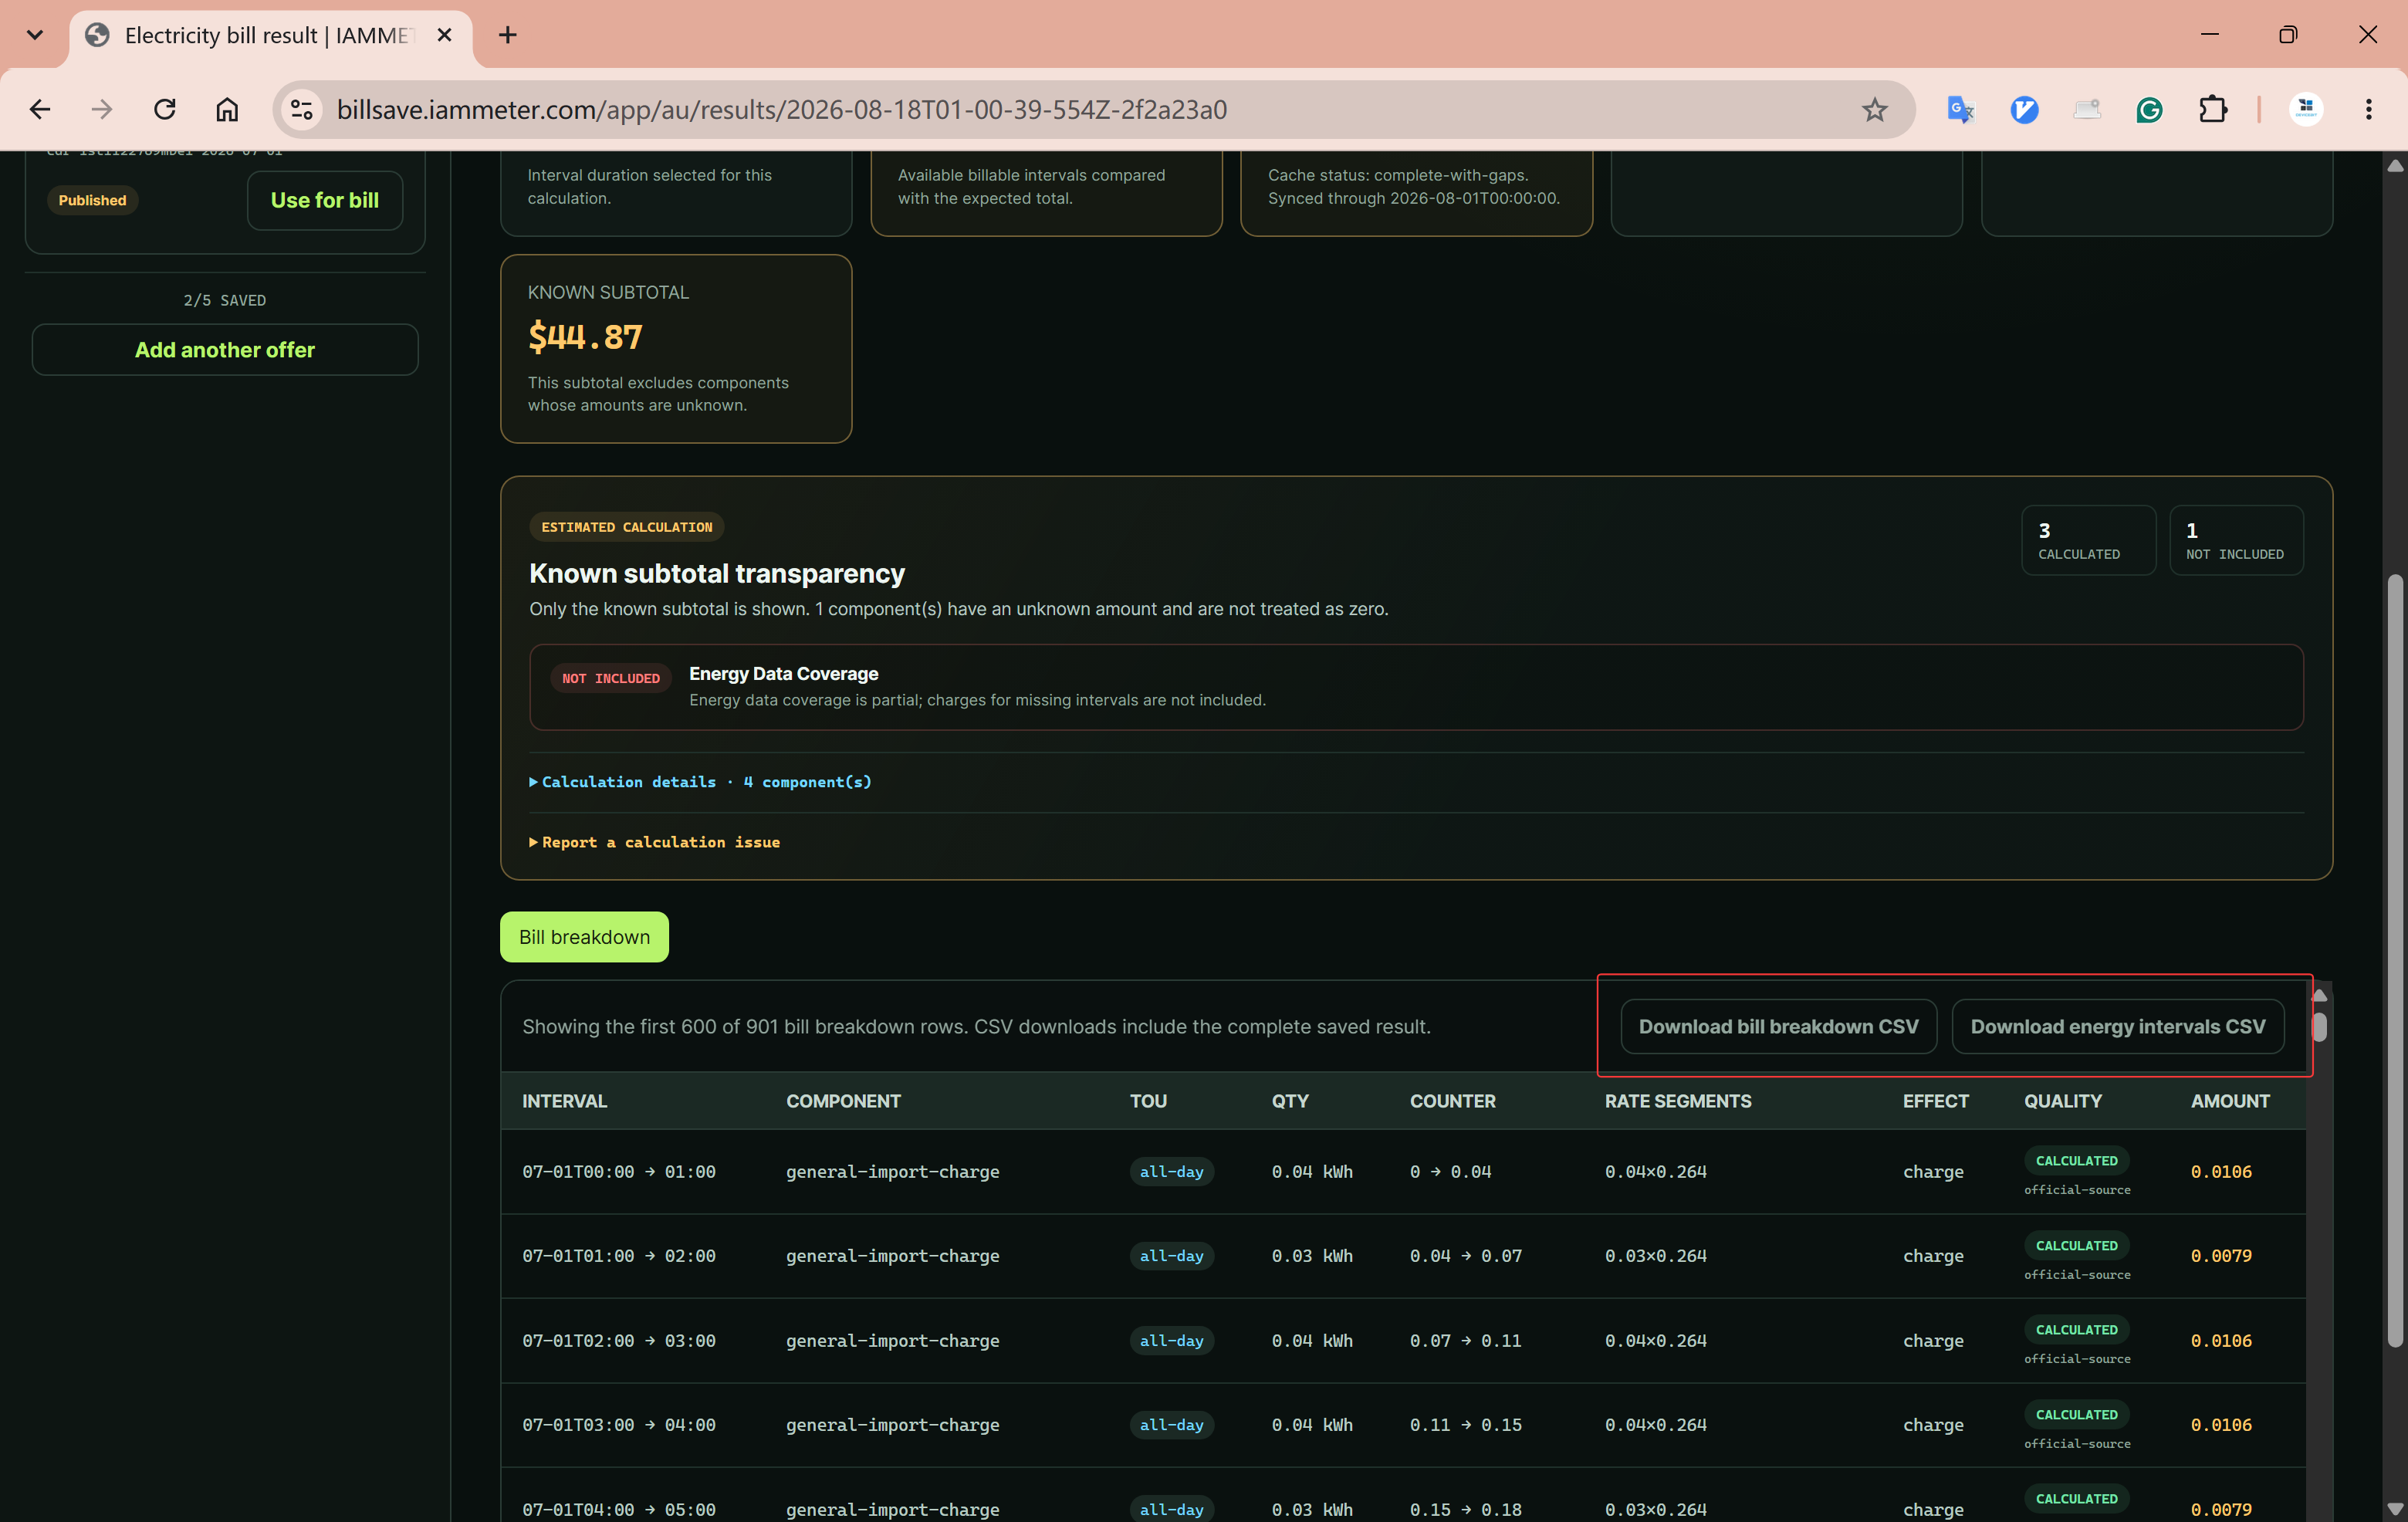
Use the available downloads to save the complete bill breakdown CSV, energy intervals CSV and versioned audit JSON.

Review an estimated BillSave result
Review quality, assumptions and components as well as the estimated total.

STEP 9

Review previous calculations

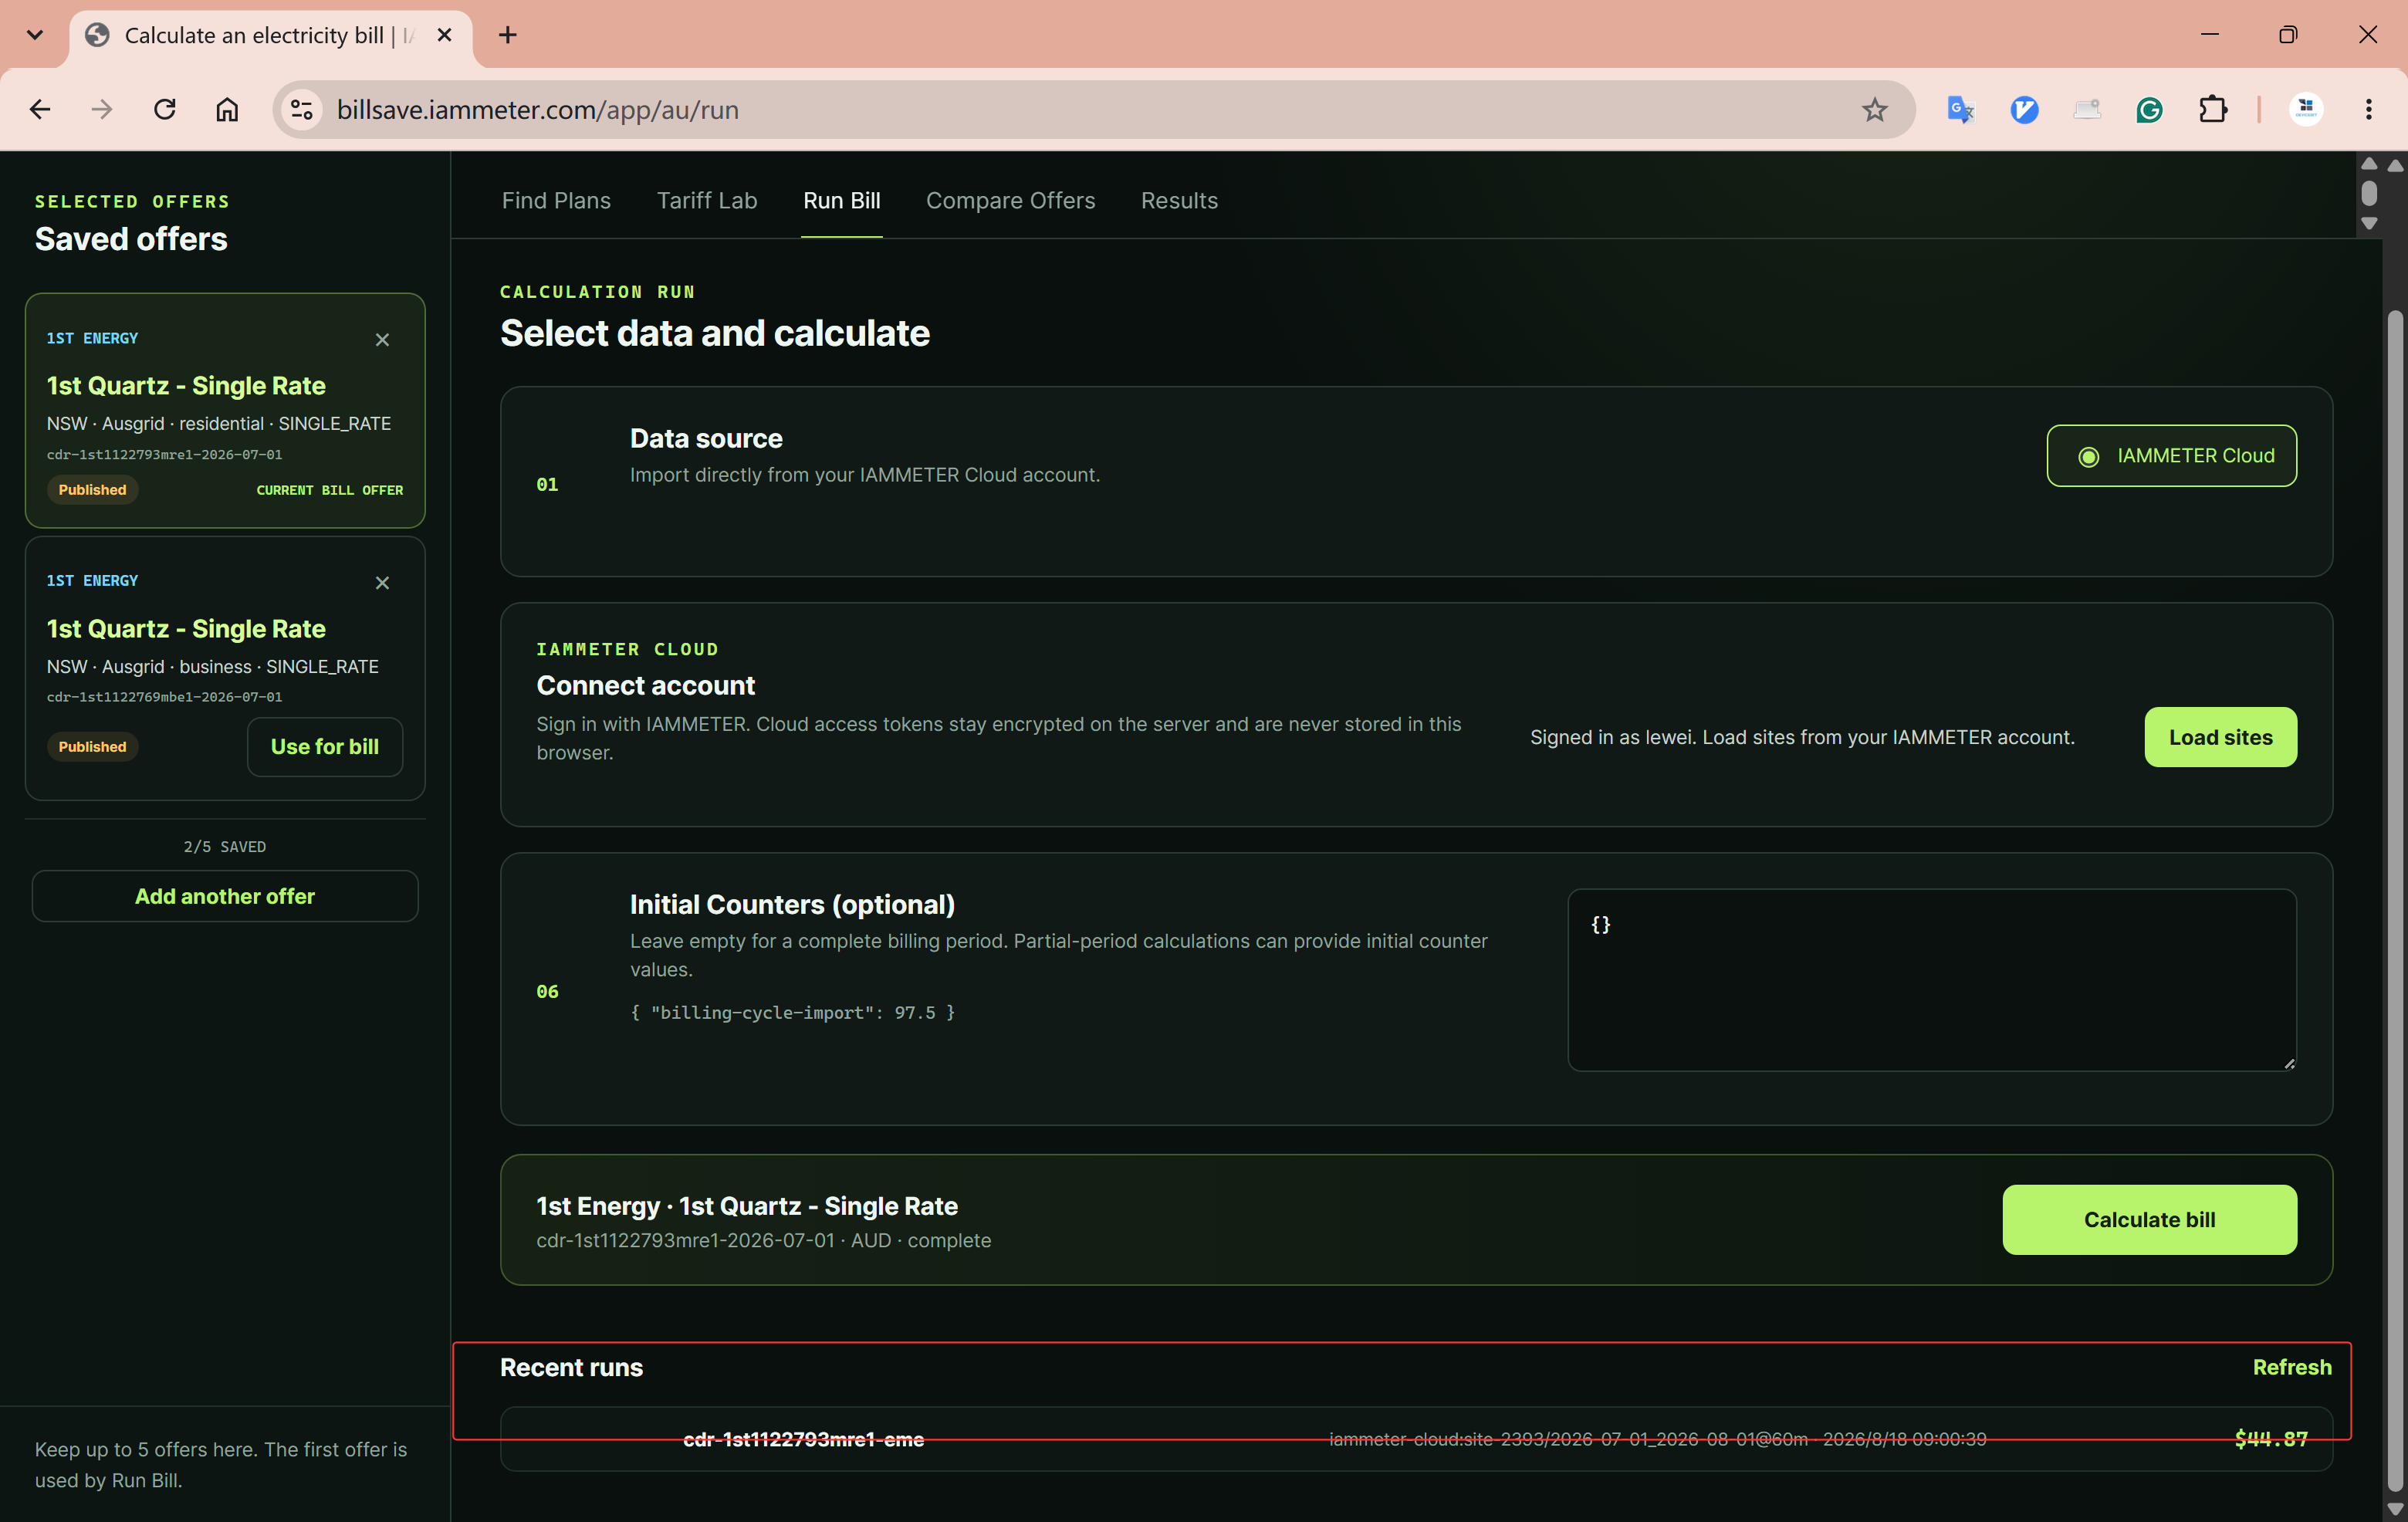
Open Recent runs under Run Bill and select a calculation to reopen its saved result. A historical Run preserves the Tariff version, parameters, quality and calculation evidence used at that time.

Use Recent Runs to check a previous result or investigate why a result changed after selecting another Tariff version or customer value.

Open Recent Runs in IAMMETER BillSave
Choose a saved calculation from Recent Runs.
Review a detailed historical BillSave Run
The saved Run reopens in the Results page.

STEP 10

Compare selected offers

BillSave compares only the Offers you explicitly keep in the sidebar, up to five at a time. Every Offer uses the same immutable energy revision.

Verified and estimated results remain separate, while an Offer missing required information appears as needing setup. BillSave does not guarantee that the lowest displayed result is the cheapest Offer available to you.

  • Return to Find Plans and add the Offers you want.
  • Put the intended reference Offer first.
  • Open Compare Offers.
  • Choose the same Cloud Site or uploaded Dataset and billing period.
  • Select Compare offers.

STEP 11

Submit a missing offer

If the required Offer is not in Find Plans, select Can’t find your plan? Submit URL, sign in, enter the official plan URL and optionally add the provider and Plan name.

Prefer an official retailer Offer page, price fact sheet, Offer document or regulator-hosted disclosure. Submission creates a review request; it does not automatically import or publish a Tariff.

Follow the request under Submitted plan URLs. You may also describe a calculation problem on the community forum without including private connection or account information.

TROUBLESHOOTING

Common setup and calculation problems

My IAMMETER Site is not listed

  • Confirm that the connected IAMMETER account can access the Site.
  • Reload the Site list and confirm the Site exists in IAMMETER Cloud.
  • Sign out and reconnect if authorisation has expired.

The Offer does not appear

  • Try the retailer name without the Plan name.
  • Remove overly narrow filters.
  • Add more leading NMI characters or a postcode if the network is ambiguous.
  • Submit the official Offer URL when it is genuinely missing.

More setup is required

  • Review every required customer parameter and its source.
  • Check the Site, billing cycle and meter-role mapping.
  • Do not guess a Network Tariff Code merely to force a result.

My uploaded file is rejected

  • Use the BillSave CSV template with an explicit offset or Z in every timestamp.
  • Keep every row at the same 5, 15 or 30-minute interval.
  • Use NEM12 v2.7 only in Australia and confirm every kWh stream.
  • Review Preview for gaps, overlaps, invalid timestamps and non-actual quality.

Controlled Load looks incorrect

  • Use Controlled Load only for a separately measured eligible circuit.
  • Do not map the same main channel to both Grid and Controlled Load.
  • Remove the assignment when no independent channel exists.

The result differs from my bill

  • Match the billing periods exactly and verify the Tariff effective date.
  • Check import, export and Controlled Load mappings.
  • Review customer parameters, conditional fees, benefits and data coverage.
  • Read the quality explanation and detailed bill breakdown.

READY TO START?

Calculate an electricity offer

Choose a country and a supported Offer, then upload your interval CSV data to calculate and compare bills. IAMMETER users can instead sign in with IAMMETER and load Cloud Site data directly. Confirm eligibility, current official tariff documents and customer-specific terms before making a decision.